Assembly of the balance stage, enclosure, collection plate, and recording devices
The balance stage and enclosure are fabricated to fit a Nalgene Metabolic Cage (Ancare, Model 650-0311 and a Mettler Toledo New Classic MF (model MS 303S)precision analytical balance. The enclosure and balance stage dimensions may need to be adjusted if using a different metabolic cage or balance. A complete list of items required to build the Urosourcerer Flowmetry system is available in the Parts List. Materials are available in most hardware stores or can be purchased online.
Tools required to assemble the unit include:
- Metal snips or saw (a hack saw will suffice) to cut stainless steel sheeting and aluminum angle bars
- File to smooth rough edges of metal
- Vice or other tools to bend metal
- Drill with 3/8 inch bit
- wooden yard stick and pencil to mark plexiglass cuts
- Glass cutter or box cutter to score plexiglass
- Scissors to cut Velcro®
- Caulking gun to apply acrylic adhesive to plexiglass
- Wrench to adjust and tighten camera mount
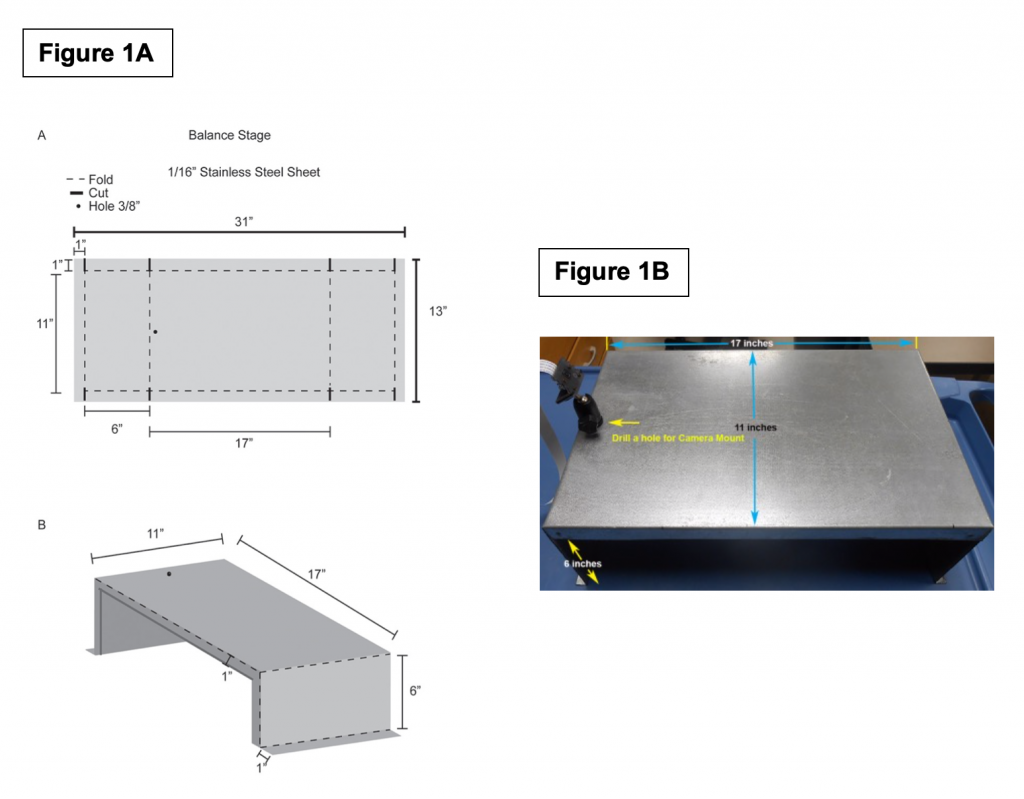
- Stage fabrication. A stage elevates the balance, placing it in close proximity to the bottom of the metabolic cage. The balance stage is fabricated from 16 gauge (0.06 inches nominal thickness) stainless steel sheeting. Sheeting dimensions, cut lines (solid) and bend lines (dashed) are depicted in Figure 1A. Perpendicular corner cuts allow the steel to be folded at a 90⁰ angle to increase rigidity (Figure 1A). Drill a 3/8 inch hole on the back of the stage and install camera mount to the stage (Figure 1B).
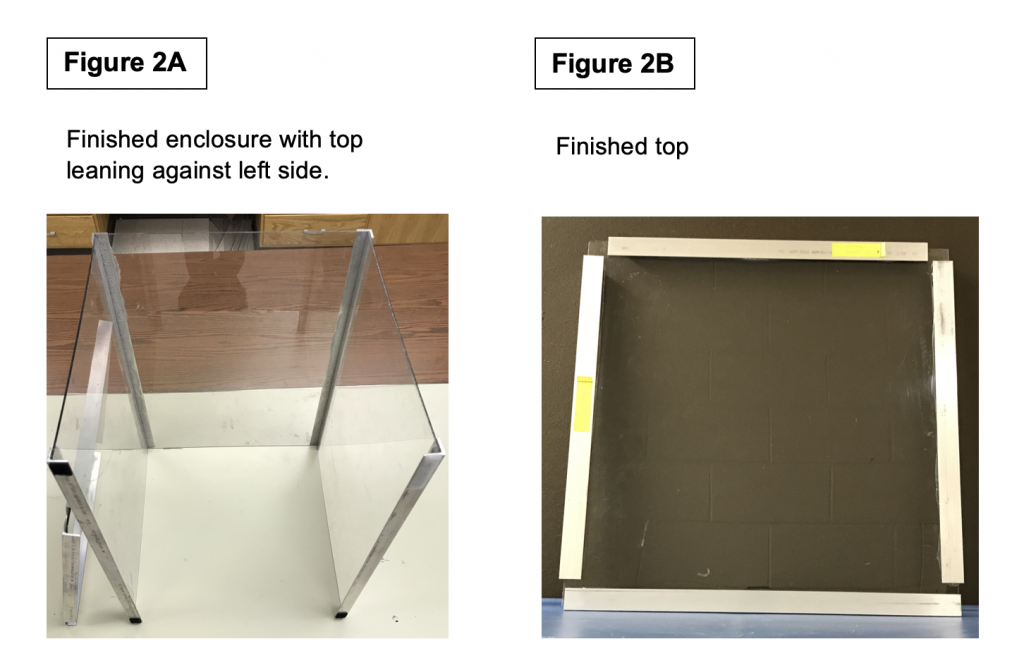
- Enclosure construction. An enclosure isolates the balance and metabolic cage from air current and reduces ambient noise. Build the enclosure using rectangular plexiglass side panels, door, and square top panel. It may be more convenient to have the plexiglass cut to the desired dimensions by the supplier. Plexiglass can shatter when cut. It typically comes with a paper covering. Do not remove the paper covering prior to cutting. Use a wooden yard stick and pencil to mark the cut you wish to make on the paper covering the plexiglass. Using the yardstick as a guide, score the plexiglass with a glass cutter or the back (dull side) of a box cutter. Score each line 5-10 times (the deeper the cuts are made, the easier it is to snap the plexiglass along the desired line). Turn the sheet over, and create a duplicate groove that mirrors the previous line. Place the groove at the edge of a bench or table with 90⁰ edges and position a block of wood (2 inch x 4 inch works well) that is longer than the cut on top of the plexiglass adjacent to the cut. While holding pressure on the block of wood to keep the plexiglass in place, press down firmly on the cut. The plexiglass will snap along the line of the cut.The left, right, back and top walls are adhered to the aluminum corner braces using acrylic caulk. The front wall is removable and adhered to the rest of the enclosure using Velcro® hook and loop strips. The enclosure bottom is open so that the entire enclosure can be lifted over the metabolic cage and balance. Figure 2 provides an overall view of the enclosure when finished.
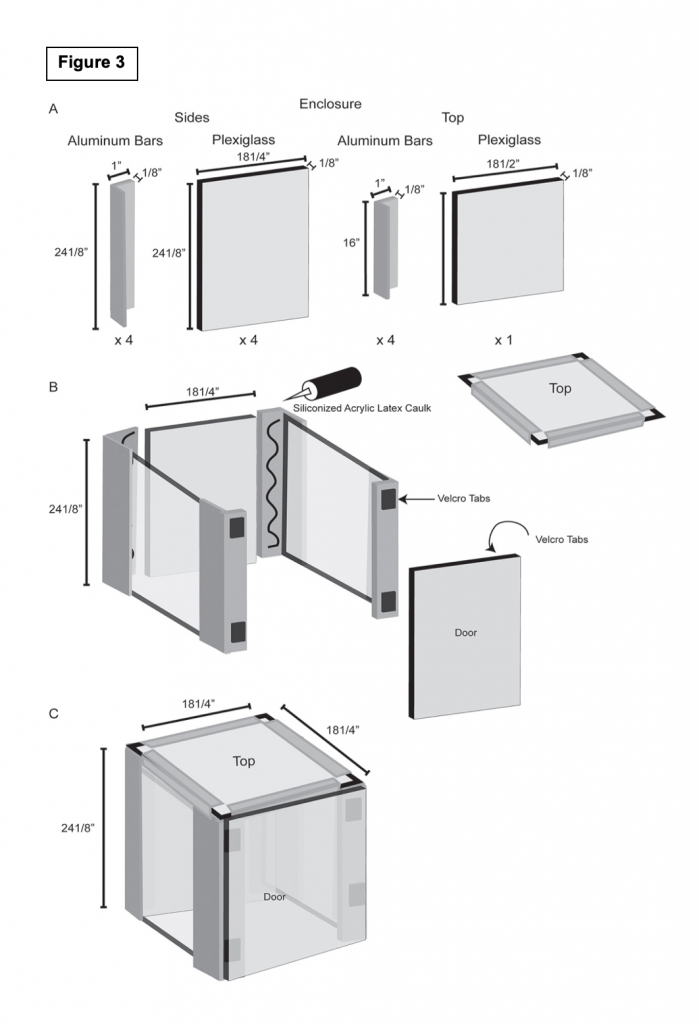
2.1. L-shaped aluminum bars serve as corner supports. Cut four aluminum alloy angle bars (1 inch x 1 inch 1/8 inch thick to a length of 24.125 inches (Figure 3A).
2.2. Wall fabrication: plexiglass panels serve as vertical walls. Cut four plexiglass panels (1/8 inch thick) to 18.25 x 24.125 inches (Figure 3A).
2.4. Back wall assembly: apply siliconized acrylic latex caulk to inside surfaces of two aluminum bars and affix plexiglass firmly to bars using even force across their length. Wait approximately four days for full curing of the caulk (Figure 3A).
2.5. Left and right vertical wall assembly: prepare as described in 2.3 and as shown in Fig. 3B. Support vertical walls while the caulk cures. Do not attach the front plexiglass panel (door) with caulk.
2.6. Front wall (door) assembly: cut four 3-inch pieces of adhesive-backed Velcro®loops and adhere to the front panel (Fig. 3B). Cut four 3-inch pieces of adhesive-backed Velcro®hooks and affix to the top and bottom of the front facing aluminum bars.
2.7. Top assembly: cut an 18.5 inch square plexiglass panel (Figure 3C) and adhere to the aluminum bars with caulk. The top rests on the walls of the enclosure.
- Collection plate fabrication: Cut a seven inch square piece of plexiglass to sit on top of the balance and protect it from urine droplets.
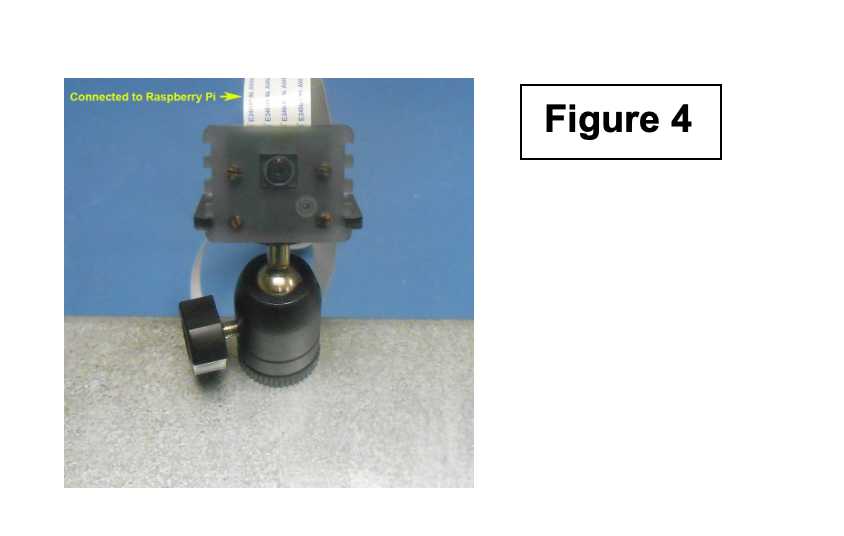
- Camera. Secure camera to mount and connect camera to Raspberry Pi using a ribbon cable as shown in Figure 4.
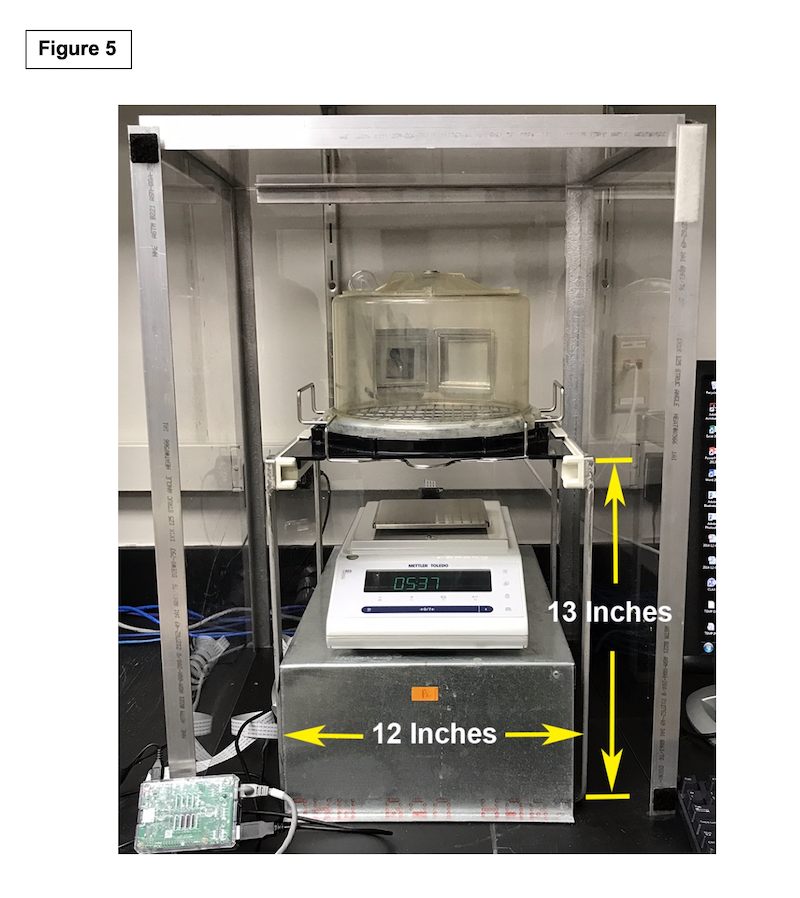
- Final assembly: Assemble metabolic cage and balance within enclosure as shown in Figure 5. Remove front wall from enclosure. Insert metabolic cage. Place balance on the stage and position both underneath the metabolic cage. Center collection plate on balance.
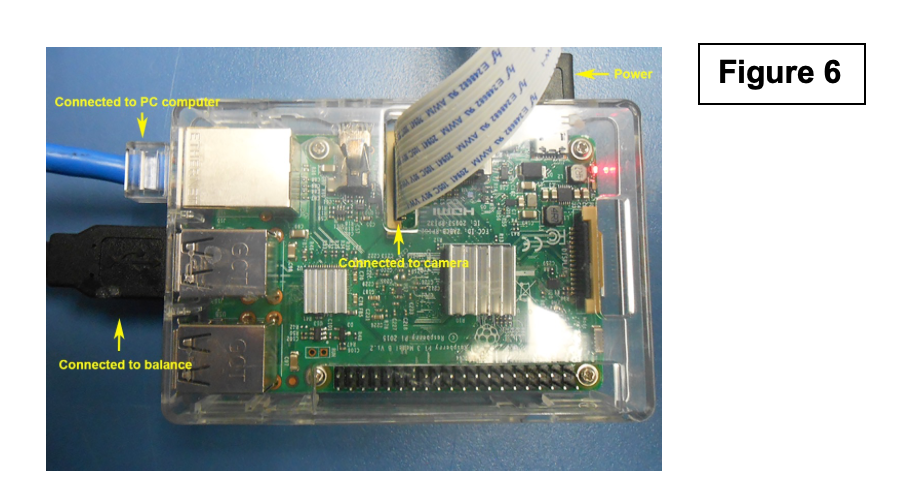
- Rasberry pi overview. Raspberry Pi processor outputs are shown in Figure 6.
6.1. Rasberry Pi assembly: connect Raspberry Pi to the balance using the USB cable included with the balance as shown in Figure 7.
6.2. Connect Raspberry Pi to main computer using Ethernet cable.
6.3. Refer to the protocol for how to begin recording. View video movies and adjust camera mount to focus camera on the bottom of floor grid.
